
Unreal Engine : How To Create An Icon Of Any Mesh ( Complete Guide )
Learn how to create custom icons in Unreal Engine using a 3D to 2D texture conversion technique. Perfect for RPG inventory systems and UI materials.

Creating custom icons for your game can be a game-changer, elevating the visual appeal and user experience. If you're using Unreal Engine, you're in luck! The Unreal Engine icon generator is a powerful tool that allows you to transform 3D meshes into stunning 2D textures for your game's UI. In this guide, we'll walk you through the process of setting up and using this icon generator, perfect for crafting custom inventory icons or enhancing your RPG inventory system.
Setting Up the Unreal Engine Icon Generator
To get started with your icon generator, follow these steps:
- Create a new Blueprint class and name it "BP_IconGenerator".
- Add a Scene Capture Component 2D to your Blueprint.
- Create a new Render Target in your project's content browser.
- Set the Render Target as the Texture Target for your Scene Capture Component 2D.
- Add a Static Mesh component to your Blueprint - this will be the object you'll create icons from.
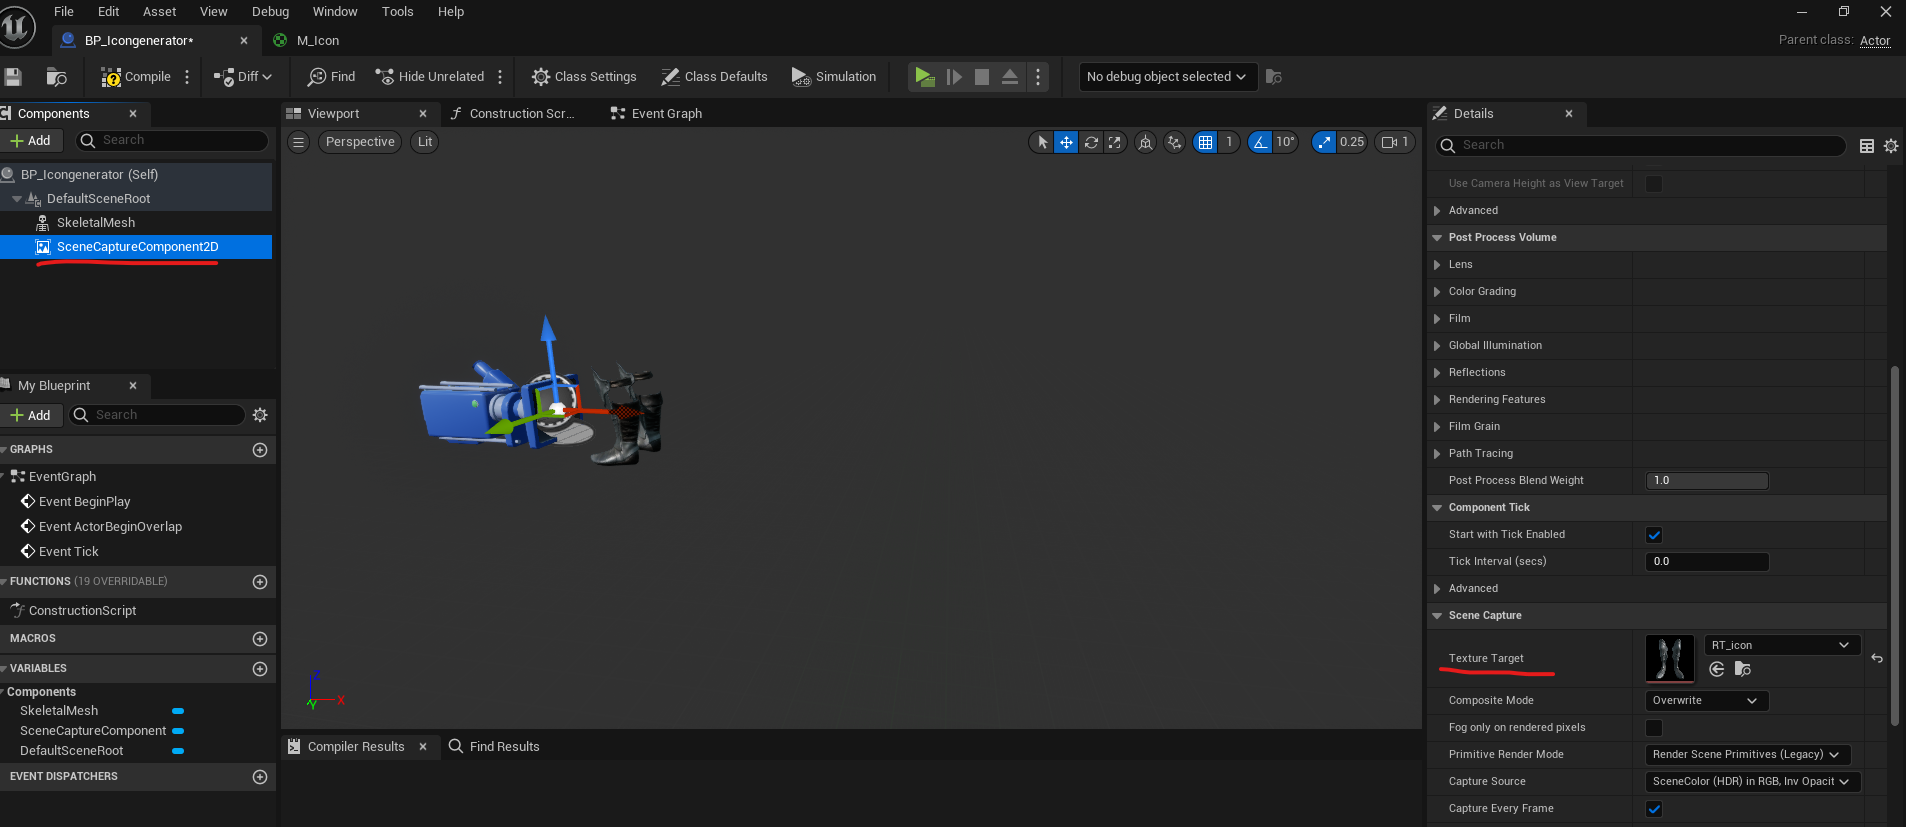
With these components in place, you've laid the foundation for your Unreal Engine icon generator. The Scene Capture Component 2D will act as a camera, capturing the 3D mesh and converting it into a 2D texture.
Crafting a Custom UI Material for Render Targets
To make the most of your icon generator, you'll need to create a custom material:
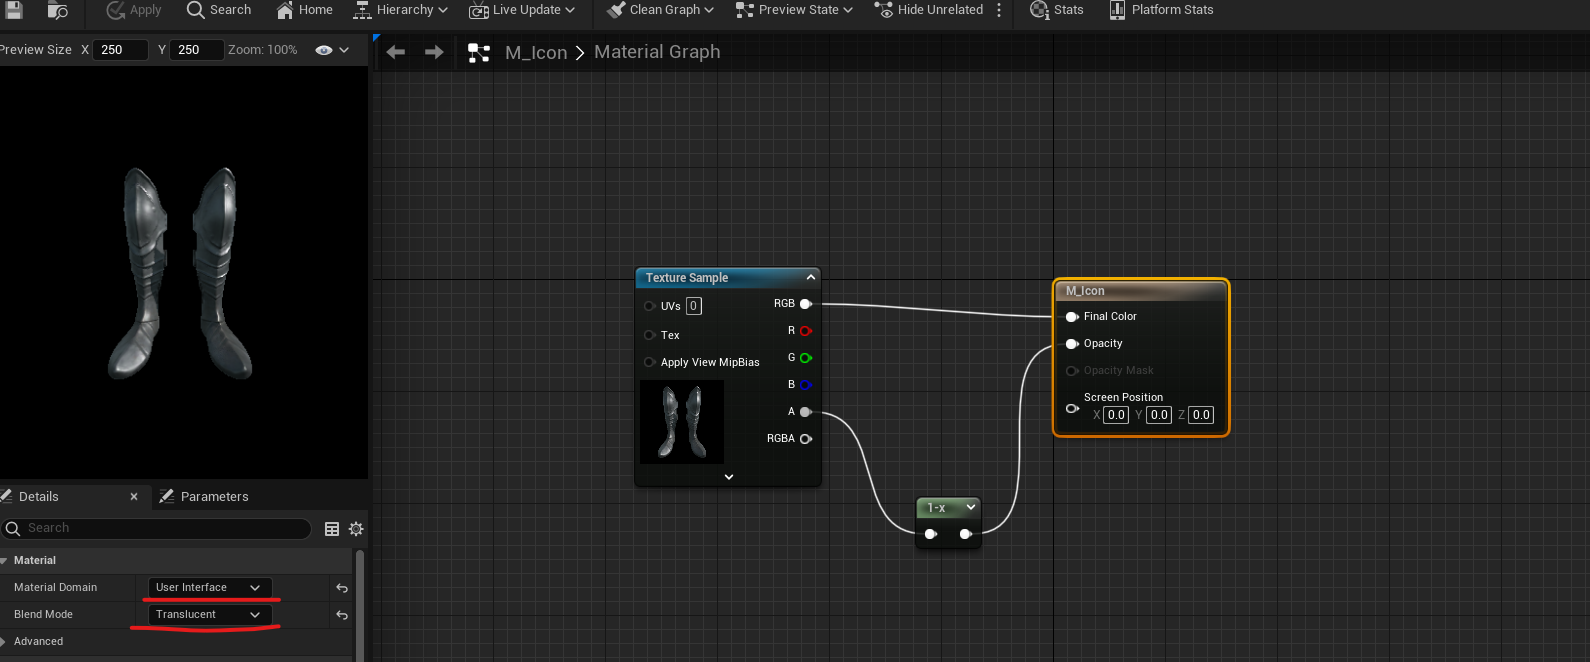
- Create a new material in your content browser.
- Set the material domain to User Interface and the blend mode to Translucent.
- Add your Render Target to the material graph.
- Connect the RGB output to the Final Color input.
- Use a One Minus node on the Alpha channel and connect it to the Opacity input.
This custom material will ensure your icons display correctly in your game's UI, with a transparent background for seamless integration.
Fine-tuning Icon Generation and Visualization
Now that you have your icon generator set up, it's time to fine-tune the process:
- In your BP_IconGenerator, add two Plane components - one for the icon and one for the background.
- Apply your custom UI material to the icon plane.
- Adjust the position and rotation of your static mesh for the best icon appearance.
- Use precision controls by setting the snap size to 1 for accurate mesh placement.
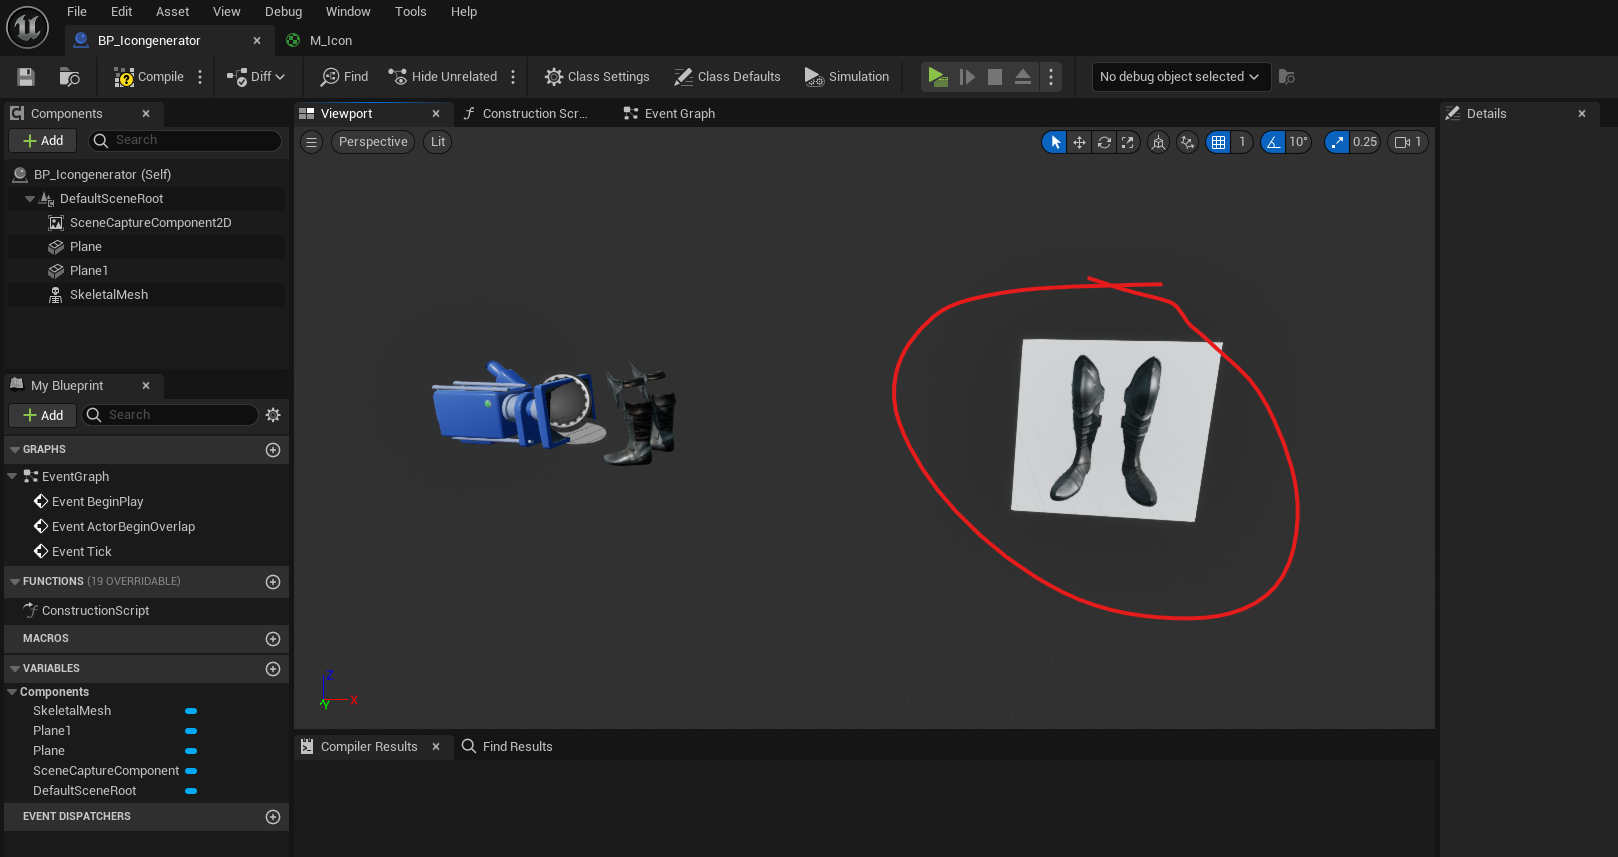
Take your time to find the perfect angle and position for your mesh. Remember, this will be the view that players see in your game's inventory or UI.
3D to 2D Texture Conversion: The Final Steps
With your icon looking just right in the Blueprint editor, it's time to create a static texture:
- Right-click on your Render Target and select "Create Static Texture".
- Name your new texture appropriately (e.g., "T_KnightBoots").
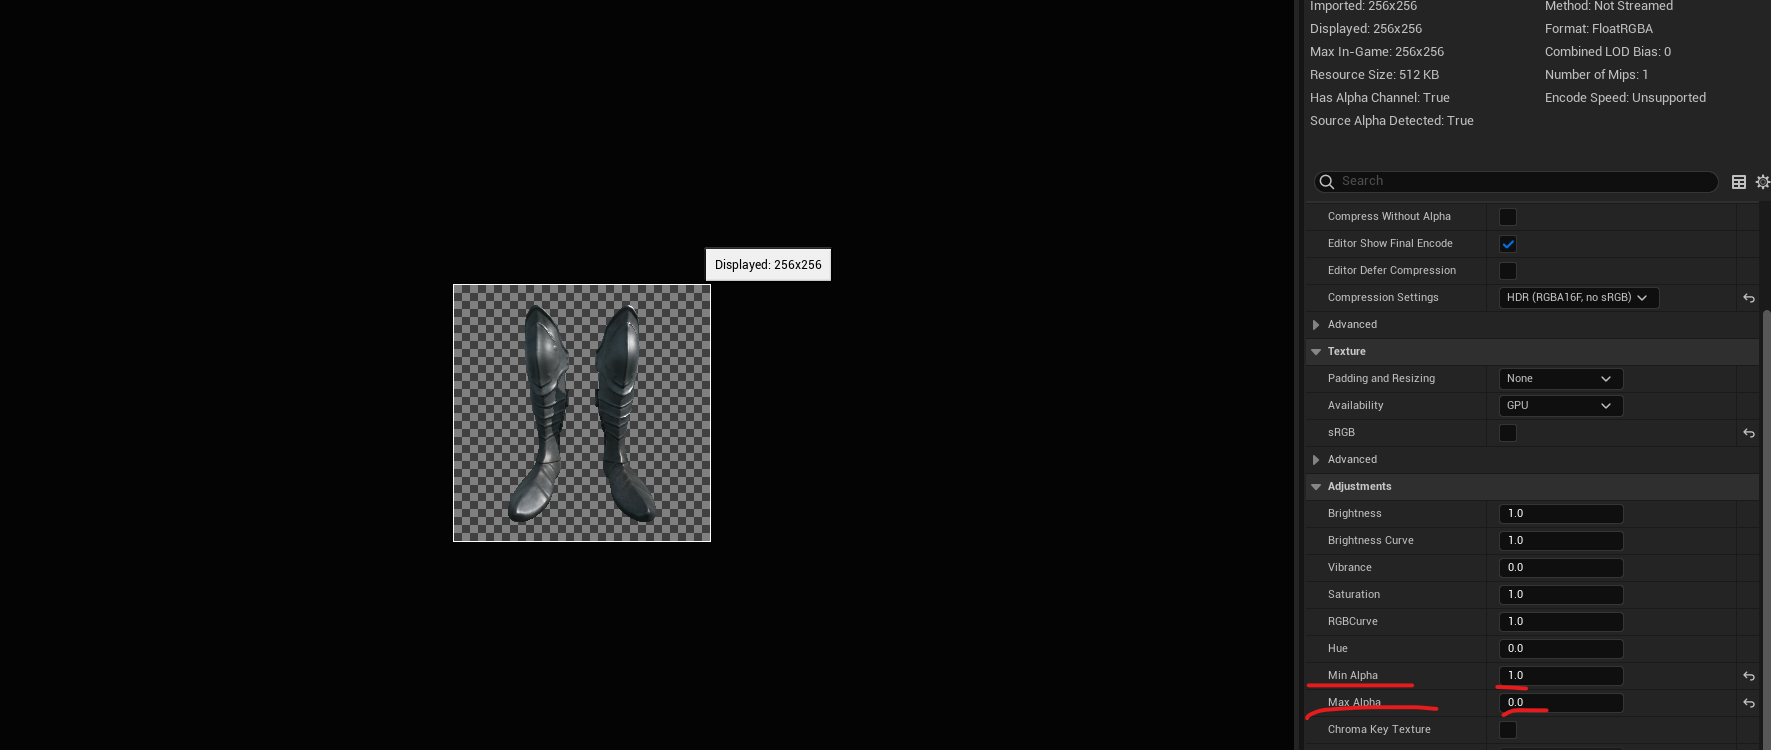
- Open the new texture and adjust its settings:
- Set Min Alpha to 1
- Set Max Alpha to 0
- These settings will remove the background, leaving you with a clean, transparent icon.
Congratulations! You've successfully created a custom icon using the Unreal Engine icon generator. This process allows for consistent, high-quality icons that will enhance your game's visual appeal.
Summary
Now that you have your custom icons, it's time to put them to use in your game. These icons are perfect for an RPG inventory system, where visual representation of items is key to player engagement. Consistent icon style and quality can significantly improve the user experience, making item management more intuitive and enjoyable for players.
To Learn more about how to create an RPG Inventory system in Unreal Engine check out my RPG Inventory Unreal Engine Course

And if you are just getting started learning Unreal Engine, have a look at the Unreal Engine for Beginners Course :
